Garlic Scapes and Gooseberries!

For those of you looking for new ingredients to incorporate into your cooking this spring-into-summer, I’m going to turn back to the unusual classics of cuisine! Spring-into-summer is a great time to try new ingredients, pull out old ones in a new way, or reinvent that delicious dish from your childhood. Let’s take a peek at two delicious ingredients and ways that you can bring fresh fruits and vegetables into your life.

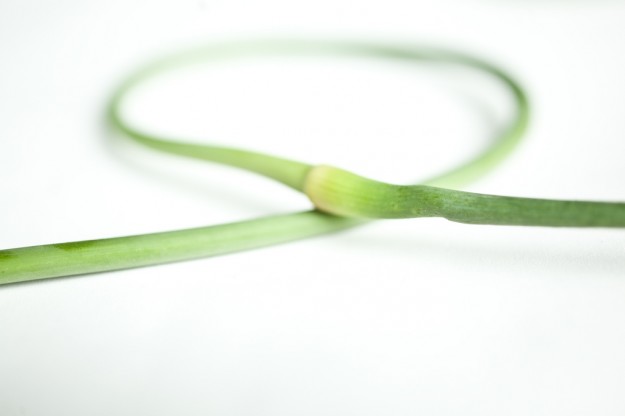
Garlic Scapes are an incredible part of this traditional vegetable that most people overlook. In fact, I was just put on their trail a few days ago, and now I can’t get enough! They’re the twirly, curly, green-onion-y growth of the garlic (that thing that starts to sprout if you let your garlic sit too long). Cut off long before garlic harvesting, these sprouts are actually a delicious ingredient that can be chopped up into pestos, sauces, and other dishes.

Garlic Scapes
So what’s the best way to use garlic scapes? From what I’ve heard and in my personal opinion, it’s by making a pesto. Thick on crackers, thin in soups, pesto is a delicious addition to any lunch or dinner. Throw a dollop into your slow-cooker or spread a layer on a boring sandwich for a garlic-y, basil-y depth that you weren’t expecting!

  • 10 Garlic Scapes
  • 1/3 cup nuts (such as pistachios or almonds)
  • 1/3-1/2 cup grated Parmesan
  • Salt and Pepper
  • 1/3-1/2 cup olive oil

Blend and mix for deliciousness that you won’t forget! You’ll never go back to ordinary garlic cloves after this!

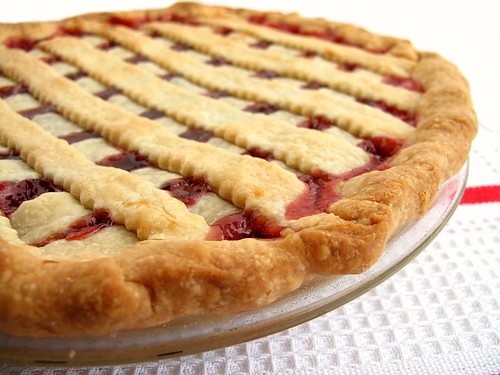
And what would summer be without the traditional but oft o’erlooked Gooseberry? Even better, let’s throw these tart-sweet treats into a pie that will wow any of your neighbours! These fuzzy berries can be used when they are firm and tart or soft and sweet, so be conscious of what sort of gooseberries you’re picking to put in your pie, as you may want to add or remove sugar tending to their ripeness.

Gooseberry Pie
I’m going to take this recipe from AllRecipes, but I’ve altered it, so if you would like to look at the original, go here. So, let’s take a peek at this pie, shall we?

  • 3 cups gooseberries
  • 1 cup sugar
  • 2 and 1/2 tblsp quick-cooking tapioca
  • 1/2 tsp salt
  • double crust pastry
  • 2 tblsp milk
  • 1 further tblsp sugar

Gooseberries

  1. Stem and rinse berries.
  2. Crush 1/2 cup berries in the bottom of a saucepan. Combine sugar, tapioca, and salt; mix with crushed berries. Cook and stir until mixture boils. Cook for 2-3 more minutes. Remove from heat, and add in remaining whole berries.
  3. Pour fruit filling into pastry. Adjust top crust , cut slits for escape of steam. Brush with milk and sugar.
  4. Bake at 400 degrees F (205 degrees C) for 40-45 minutes.

Good luck with your gooseberries and garlic scapes! Now you have two great recipes to try out and cook as the weather starts to get hot. Celebrate a ripe season with these great recipes and feel free to leave any comments about posts you’re interested in. We’d love to hear about what themes are your favourites and what you’d like us to write more about! Cheers!

-A.

Photos Courtesy Of:

Better than S’mores!

You didn’t think it would happen, did you? The day that someone presented you with an easy, oven made, fireside-style treat involving carbs and marshmallows — that they claimed was even better than s’mores. Before we begin, let me tell you why these Peanut Butter Marshmallow Treats are better than s’mores, because I don’t think you’re believing me.

Peanut Butter Marshmallow Treats

  1. They aren’t too sweet. I’m not really a fan of s’mores because the combination of the chocolate and the marshmallow tastes like Candy Land acid trip — in a bad way. With this, the peanut butter gives a salty alternative to the marshmallow, giving you a much deeper flavour than s’mores ever could.
  2. You don’t need to make them outside. I don’t know where you live, but I don’t personally like going out in the damp cold just to stuff a sticky gelatinous white ball on a stick and hope that it doesn’t burn. These, you can make in your oven.
  3. You can save your chocolate for other things — and consume a tiny bit less sugar. Since you’re using peanut butter, you aren’t using chocolate. That means a bit less sugar and a lot more chocolate for your next craving!

Peanut Butter Marshmallow Treats

Okay, so let’s see, what is it that you’ll need to make delicious peanut butter treats?

  • Saltines or Ritz Crackers
  • Peanut Butter
  • Marshmallows
  • An Oven
  • A Sheet to put in the Oven


  1. Spread peanut butter over the tops of the crackers or Saltines.
  2. Plop a marshmallow on top.
  3. Broil in oven for a few minutes, watch carefully.
  4. Enjoy!

Peanut Butter Marshmallow Treats-A.

Photos Courtesy Of:
http://img.ehowcdn.com/article-new/ehow/images/a07/q8/6d/make-peanut-butter-logs-800×800.jpg

Euro Sandwiches and Cucumber Wraps

Always the connoisseur of easy and quick, I thought I might provide you with another tasty treat after Sunday’s Chicken Soup. This time, for a light, fast, and economical lunch idea that even the kids will love, I’m going to introduce you to the world of open face sandwiches and cucumber wraps. Prepare to be amazed!

Tartine Open Faced Sandwich

Open faced sandwiches, appropriately nicknamed Euro Sandwiches, are a great way to show off your culinary sophistication in under 6 minutes. I’m going to walk you through the steps to making amazing Euro sandwiches that will leave both your guests and your family asking for more – more – more! Restaurants such as Le Pain Quotidienne sell these on large white plates; you can go casual or formal just by choosing your cutlery.

Firstly, the secret is always good bread. Find a tasty, crunchy-soft ciabatta, reliable French baguette, locally baked loaf, or sour rye. Use Parmesan toast (butter and Parmesan cheese, shredded, then toasted in a broiler) or cherry-hazelnut bread for a more exotic and sophisticated palette.

Secondly, spread the bread with some sort of condiment. Mayonnaise, guacamole, butter, jam, or salsa can all be used based on the nature of your open faced sandwich. Savoury or sweet, don’t be afraid to try sour cherry jam under turkey.

Open Faced Sandwich  But that’s not even all! Next, you’ll want to add some sort of meat. Cold cuts that you use for double-faced sandwiches will do. Turkey and ham are staples that most people will enjoy, and this is a great way to use old chicken.

And then, toppings! A thin slice of cheese, diced tomatoes, cut avocadoes, sliced cucumbers, apple thins, pepper strips, roasted pine fruits, pecans, and even sprouts and chick peas are all acceptable ideas. Match up a dijon with avocado and taste the interesting combination. Or perhaps try hazelnuts with that cherry-turkey combo I suggested.

From there, it’s whatever you make of it! For a more breakfasty style, go with a fluffy white bread (always use one with a stiff crust, since it will need to support the toppings without the help of the upper bread piece Americans are so accustomed to having), a jam with nuts and sour green apples. A dollop of Nutella, anyone?

To accompany your tasty Euro sandwiches, throw together some Cucumber wraps. These simple little vegetable groups can be made of the same ingredients used in your sandwiches, and are perfect for appetizers or colourful sides. Start out by chopping off a large (4-5 inch) slab of cucumber and then cutting it very thinly along the grain, so that you get a stripe of seeds.
Cucumber Wraps
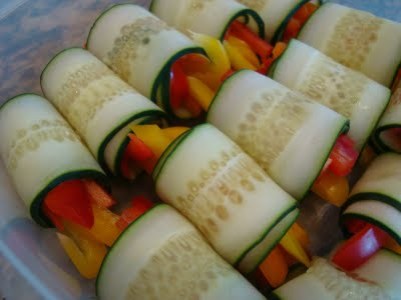
Next, fill these thin strips with pieces of vegetables (perhaps even meats!), such as strips of pepper, as demonstrated, avocado, pine fruits, apples, mangoes, more cucumber, sprouts… Add a dollop of peanut butter with a few raisins for picky, confused eaters.

If you’re having trouble getting them to stay in rolled-up form, try removing a few items and then sticking them through with a toothpick. They should stay for a while, and throwing one on a large plate next to a stylish open faced Euro sandwich makes you look like you’ve got the French bistro style down pat! If you used a jam, water it down a bit and spiral a large white plate with the new raspberry sauce, then put your minimalist, light, easy lunch down and amaze your friends! Serve with a cappucino or other beverage.

-A.

Photos Courtesy of:

Is Your Family Cookbook a Hellacious Dump?

Well, I’m here to rescue your poor imploding binder. Because of the nature of this post, I don’t have that many pictures that are perfectly related to organisation (unless you want me to upload 10 pictures of my lovely tabs), so I’ll provide you a sneak-peak to future recipes that are hidden in the binder as I go about explaining familial organisational tools. So, here we go: How to Make an Organised Family Cookbook out of your Mess.

Recipe

Step 1: Remove Everything. This is one of my family recipes (a custard) that has been removed, so delicately, from an old binder stuffed with napkin edges full of recipes. Some of them had huge stains, some were ripped in two, some had four duplicates. So when you’re taking apart what is probably, at this point, a binder falling apart or a notebook with 3 recipes on each page, be mindful that you might be handling the only recorded version of that cake or casserole. Put them in a pile, or several piles if they are already organised in some fashion, and clean out the entire old cookbook.
Banana Bread

Step 2: Purchase Replacements. Get yourself 2 2′ binders that feel sturdy and strong. Nothing that will fall apart in a month — a year — even four years. You don’t want to have to do this every blue moon. You want this to be the version you hand your grandchildren. Whether that means you have to reinforce it with steel. You want 2 because, you will probably need 2, despite what you think. If you don’t use it, you can use the other binder to store recipes you want to try, contacts, important documents, etc.

Also purchase a 100 pack of clear paper protectors. Invest in stronger ones that won’t tear at the creases and sides. Then, purchase either a stack of computer paper or coloured mounting paper (scrapbooking will do), because it will give your cookbook a much more elegant and personal feeling. Finally, get some double sided acid-free mounting tape from an office or crafts store. You can find it in the scrapbooking section.

Step 3: Rethink Your Categories. If you didn’t have categories before, or if you’re using old categories from a premade cookbook, it’s time to take charge and divvy up your recipes. Personalise. For example, I broke up breads into “breakfast” and “savoury” because my family actually  has several dozen in each section. I’ll provide you with the categories I settled with:

  • Sauces and Appetizers
  • Savoury Breads
  • Soups, Salads, Pizzas, Sandwiches, etc.
  • Beverages
  • Breads and Breakfast Items
  • Casseroles
  • Meats and Poultry
  • Fish and Seafood
  • Vegetables
  • Holiday
  • Desserts
  • Miscellaneous

Pan Seared Salmon
Step 4: Mount and Sort. I hope you bought enough double sided tape, because now it’s time to sit down with an army of family members and just go through those recipes. Put them into the categories you came up with, toss out the ones you haven’t done in 20 years (and don’t plan on doing) that have little memory value, and, if you have the man power, assign a person or two to start mounting. Double side the papers, putting recipes on both sides. Make sure that the recipes on both sides belong in the same category, and do this for as many hours as you can stand. It will go faster and faster. Mount a recipe or two on each side, slide it into a page protector, and stack them up again.

Sauteed Apples
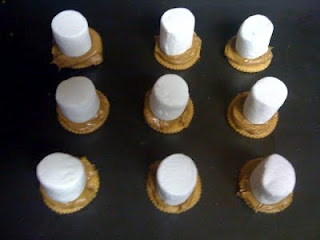
Step 5: Snap Them In and Enjoy! It’s time to take pictures of those lovely new recipe binders sitting on your pretty shelf. This means no more sifting through for lost recipes, no more using the same ones in the front, finding those great family recipes that make you laugh (Sock-It-To-Em Cake, anyone?) and finally getting them all sorted, set, and protected. The paper protectors will make sure that no more spatters ruin your grandmother’s handwriting, and the binder will let you snap them out and carry them around the kitchen as you stir and whisk up family tradition.

But wait! There’s more! Another bonus is that it is now easy for your children or pesky relatives to come and make copies. Send them to the nearest copy machine and they can unsnap and press page-by-page the recipes that they want. Now you don’t have to worry about sitting down and typing them up another copy of the illegible scrawl your German great-aunt-in-law wrote on the back of your tax returns when she visited you twelve years ago. Instead, now it’s easy and breezy.

Hopefully you’ll get inspired to clear your cluttery kitchen and start with your cookbook too!

-A.
Photos Courtesty Of: